
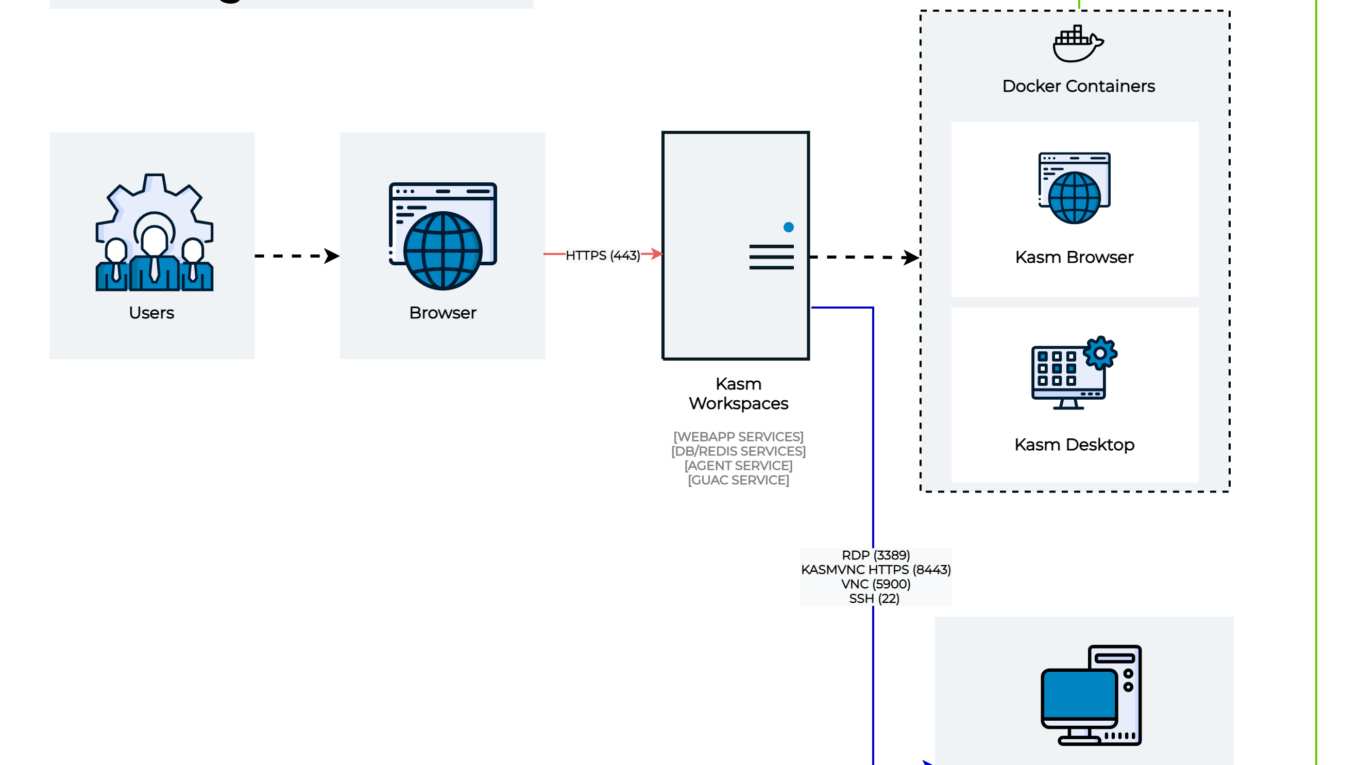
How to configure kasm in Oracle cloud
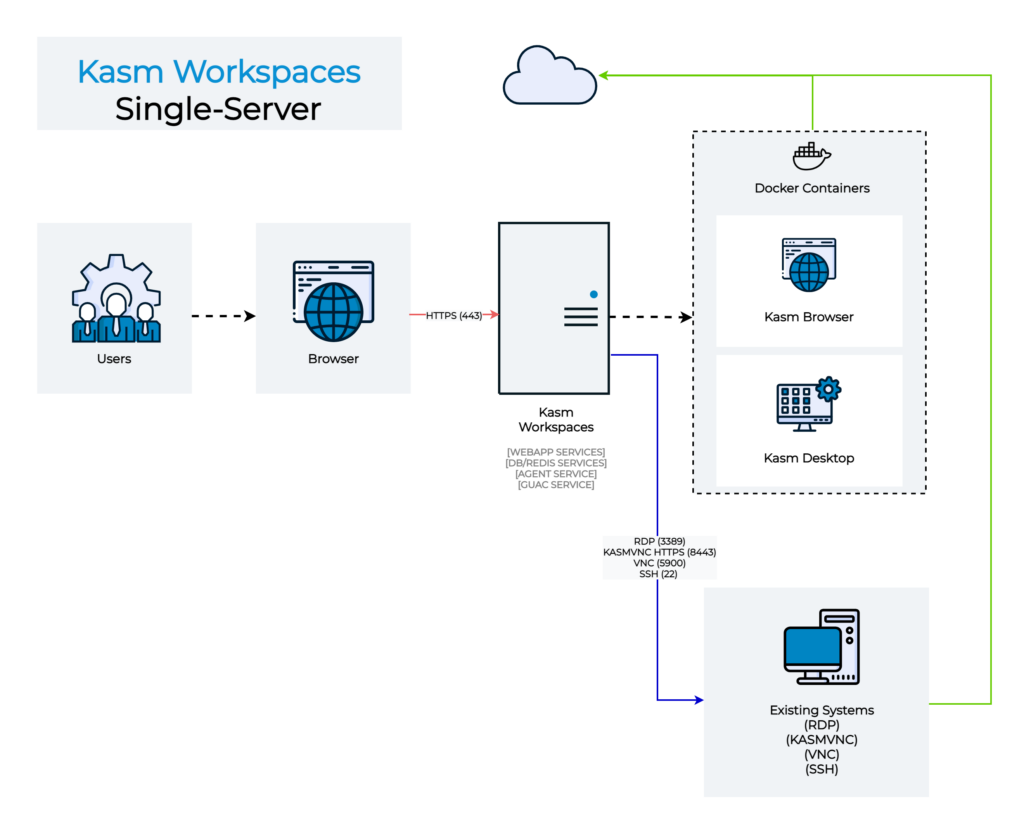
In this post, we will see what are the steps to install a kasm workspace within a machine in Oracle Cloud to have a free install that we can use to play, the stack is
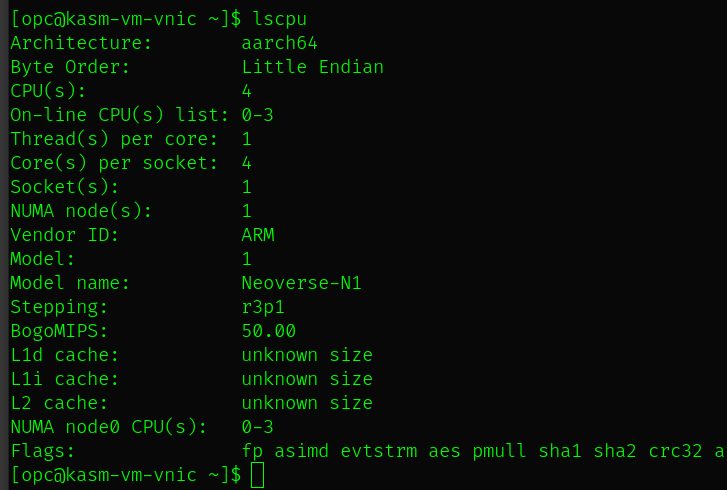
- OS Oracle Linux 8
- CPU ARM64 16GB RAM 100GB HDD
- Kasm 1.5
- docker + docker-compose
- iptables
- cerbot for encryption
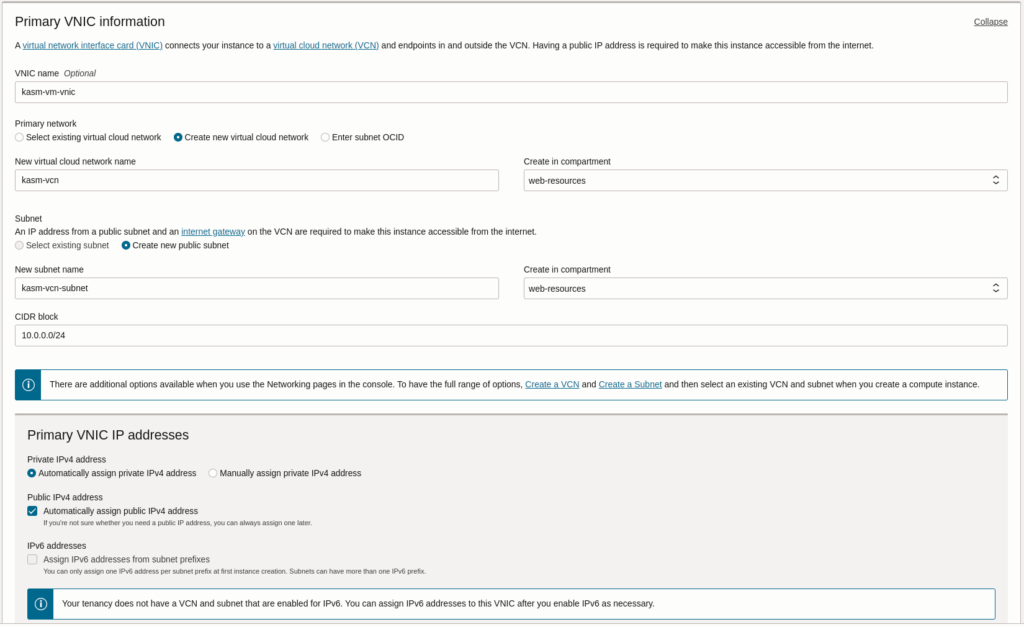
Creation of VM
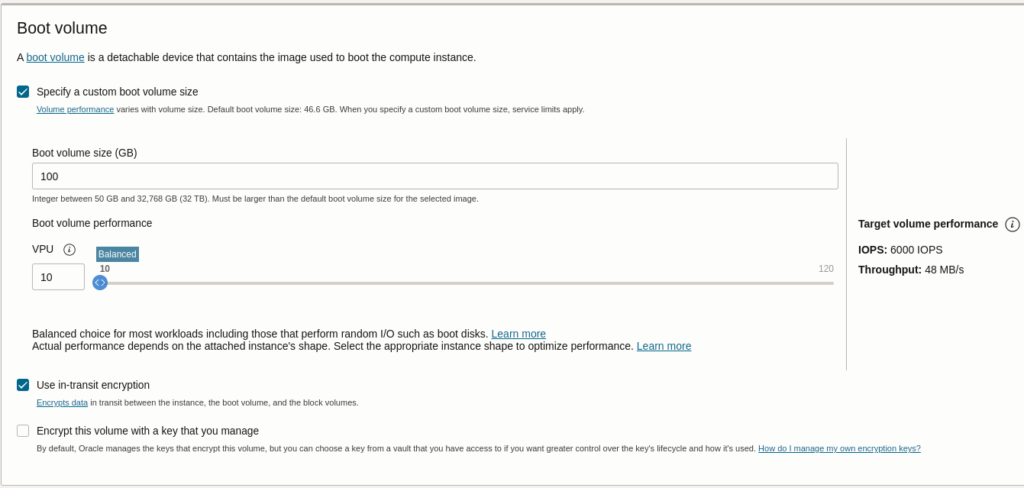
The first step is to create the VM where everything will be installed, important notes, to make the installation free we need to constrain our VM to only free resources, we will not use block volume because that costs depend on the availability zone, that means we can incur in costs if the availability domain does not have “free” block volume available or if the VM is created in a different domain than the block volume
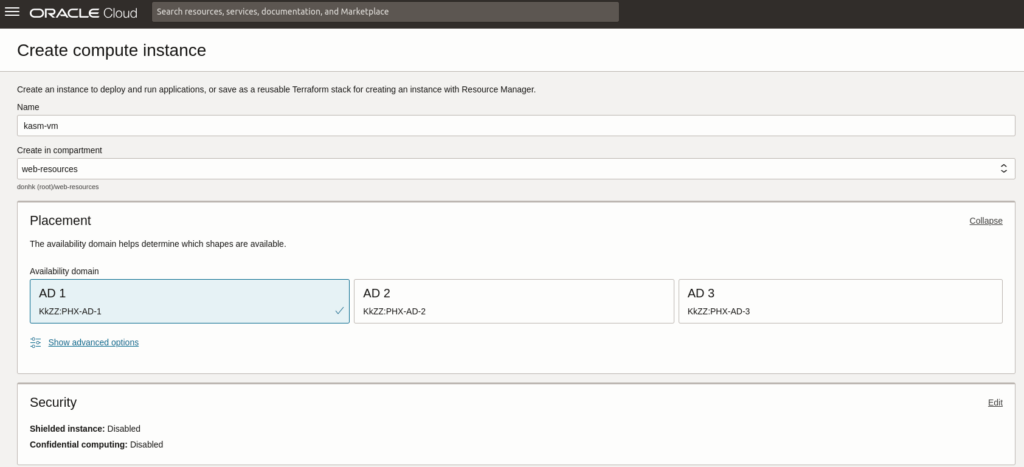
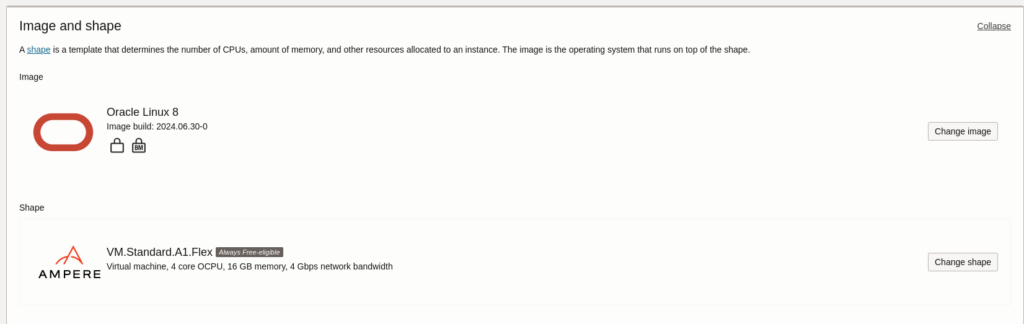
Notice that in boot volume we choose “Specify a custom boot volume” and we specify 100GB
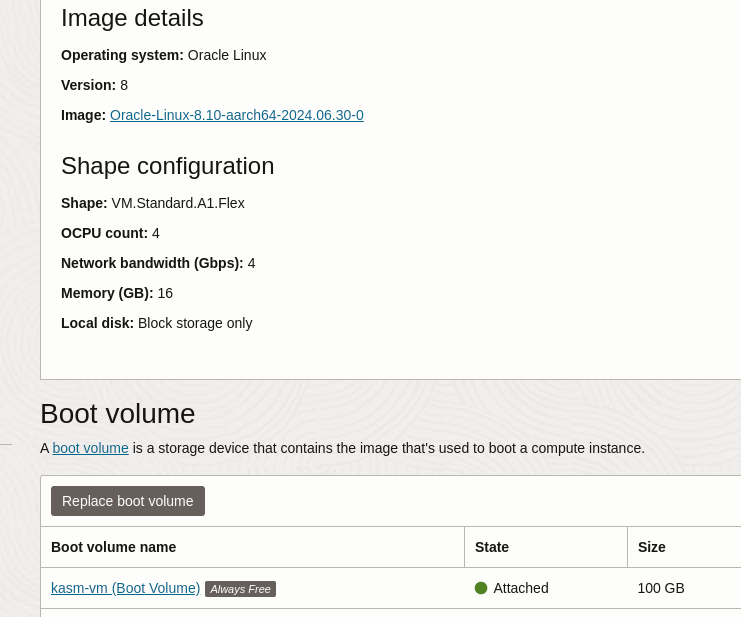
After the VM creation is finished we can go to the instances and inspect the storage, it will have the label aways free
Then we will setup the firewall rules, specifically the firewall to open the 80 and 433 ports
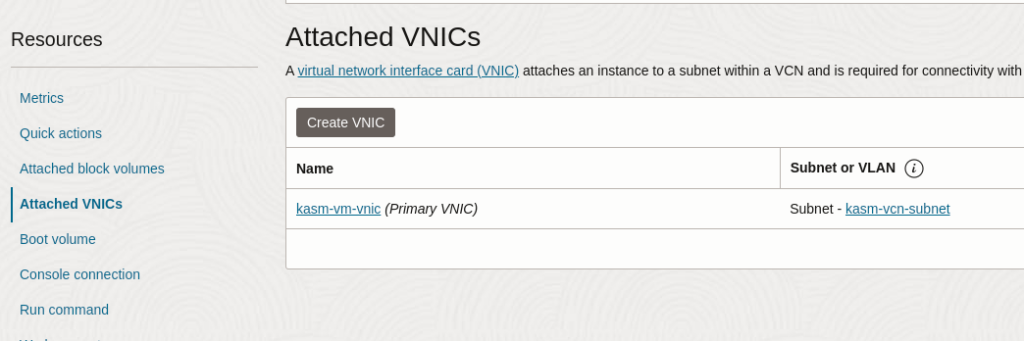
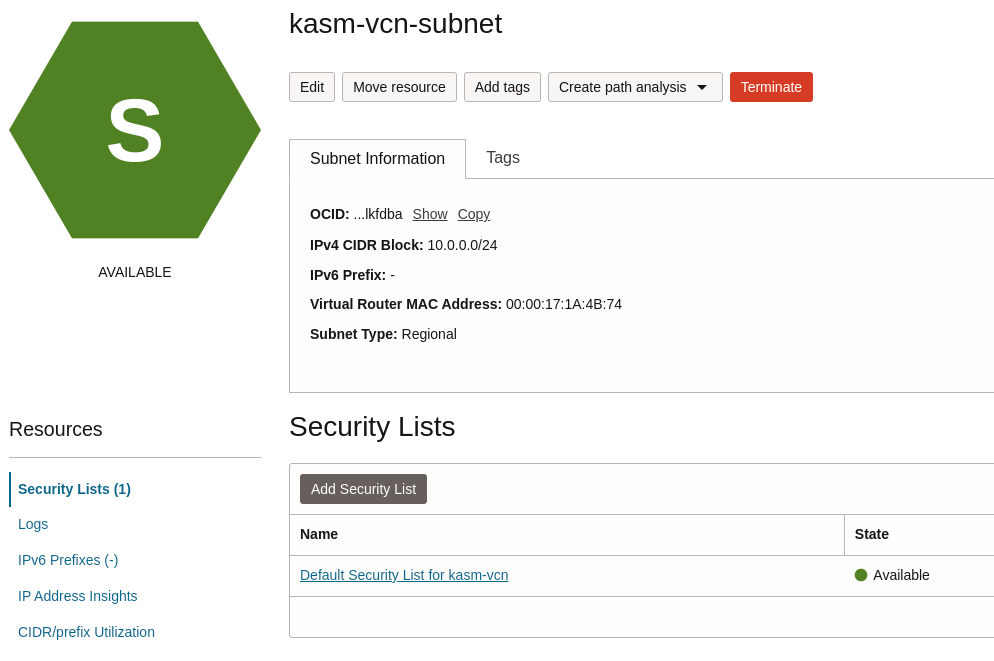
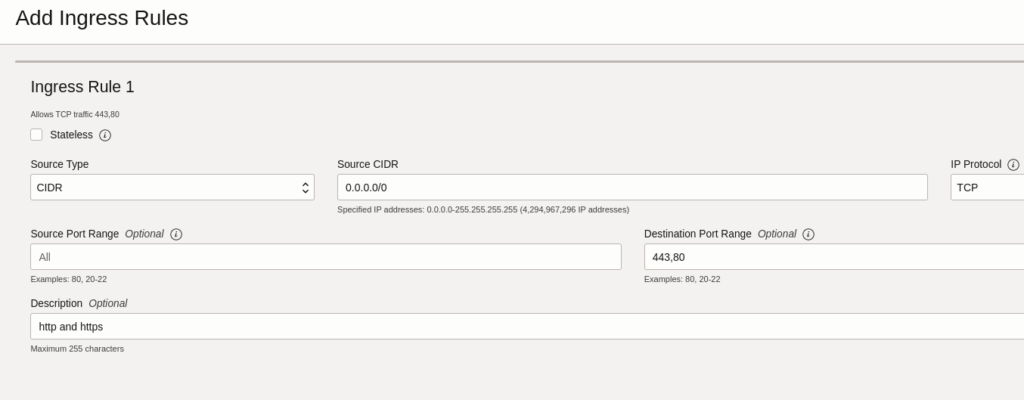
with this we finish with the VM setup, the next step is to configure the DNS to point to our VM
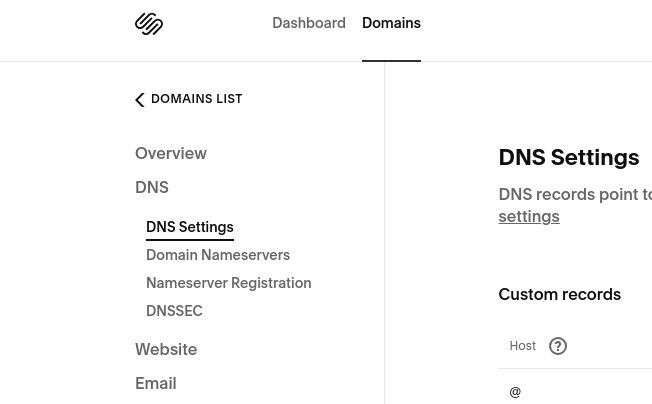
DNS A record creation
we create a new “A” record that points to the public IP of the machine we just configured
A record kasm pointing to 150.33.33.33
kasm.example.com
do not attempt to enter to the domain yet as it will not do anything yet, we need to install the service
Extend the current disk partition
By default the boot partition will only take the first 46GB of disk space and since we have a 100GB we want to use the rest, otherwise the installation will fail.
The disk partition looks like this before starting
[opc@kasm-vm-vnic ~]$ df -h
Filesystem                  Size  Used Avail Use% Mounted on
devtmpfs                    7.3G     0  7.3G   0% /dev
tmpfs                       7.3G     0  7.3G   0% /dev/shm
tmpfs                       7.3G   18M  7.3G   1% /run
tmpfs                       7.3G     0  7.3G   0% /sys/fs/cgroup
/dev/mapper/ocivolume-root   36G   12G   25G  32% /
/dev/mapper/ocivolume-oled   10G  160M  9.8G   2% /var/oled
/dev/sda2                   924M  585M  340M  64% /boot
/dev/sda1                   100M  7.2M   93M   8% /boot/efi
tmpfs                       1.5G     0  1.5G   0% /run/user/1000
tmpfs                       1.5G     0  1.5G   0% /run/user/986
[opc@kasm-vm-vnic tmp]$ sudo lsblk
NAME               MAJ:MIN RM  SIZE RO TYPE MOUNTPOINT
loop0                7:0    0 33.7M  1 loop /var/lib/snapd/snap/snapd/21761
loop1                7:1    0 59.8M  1 loop /var/lib/snapd/snap/core20/2321
loop2                7:2    0 42.9M  1 loop /var/lib/snapd/snap/certbot/3832
loop3                7:3    0   92M  1 loop /var/lib/snapd/snap/core/17201
sda                  8:0    0  100G  0 disk
├─sda1               8:1    0  100M  0 part /boot/efi
├─sda2               8:2    0    1G  0 part /boot
└─sda3               8:3    0 45.5G  0 part
  ├─ocivolume-root 252:0    0 35.5G  0 lvm  /
  └─ocivolume-oled 252:1    0   10G  0 lvm  /var/oled
only about 35GB are utilized, we can reclaim another 66GB, the default partition type is XFS we only have one device /dev/sda and 3 partitions, we will create a new partition /dev/sd4 that we will use to extend the logical volume ocivolume-root
###Step 1: Create a New Partition
#Launch fdisk on your disk:
sudo fdisk /dev/sda

#Create a new partition:

#Type n to create a new partition.
#Select the default options to use the remaining space.
#Write the changes to the disk by typing w.

###Step 2: Create a Physical Volume
#Create a physical volume on the new partition:
sudo pvcreate /dev/sda4

###Step 1: Extend the Logical Volume
#Extend your volume group to include the new physical volume:
#First, extend the logical volume to use the free space:
sudo lvextend -l +100%FREE /dev/mapper/ocivolume-root

###Step 2: Resize the XFS Filesystem
#Then, resize the XFS filesystem:
sudo xfs_growfs /

#This command will grow the XFS filesystem to use the newly allocated space. Here’s the complete process:
#Extend the logical volume:
sudo lvextend -l +100%FREE /dev/mapper/ocivolume-root

#This command will extend the logical volume to use all available free space.
sudo xfs_growfs /
This command will grow the filesystem to occupy the new space added to the logical volume.
After running these commands, you should see the additional space available on your root filesystem.
[opc@kasm-vm-vnic tmp]$ sudo lsblk
NAME               MAJ:MIN RM  SIZE RO TYPE MOUNTPOINT
loop0                7:0    0 33.7M  1 loop /var/lib/snapd/snap/snapd/21761
loop1                7:1    0 59.8M  1 loop /var/lib/snapd/snap/core20/2321
loop2                7:2    0 42.9M  1 loop /var/lib/snapd/snap/certbot/3832
loop3                7:3    0   92M  1 loop /var/lib/snapd/snap/core/17201
sda                  8:0    0  100G  0 disk
├─sda1               8:1    0  100M  0 part /boot/efi
├─sda2               8:2    0    1G  0 part /boot
├─sda3               8:3    0 45.5G  0 part
│ ├─ocivolume-root 252:0    0 88.9G  0 lvm  /
│ └─ocivolume-oled 252:1    0   10G  0 lvm  /var/oled
└─sda4               8:4    0 53.4G  0 part
  └─ocivolume-root 252:0    0 88.9G  0 lvm  /

[opc@kasm-vm-vnic tmp]$ df -h
Filesystem                  Size  Used Avail Use% Mounted on
devtmpfs                    7.3G     0  7.3G   0% /dev
tmpfs                       7.3G     0  7.3G   0% /dev/shm
tmpfs                       7.3G   18M  7.3G   1% /run
tmpfs                       7.3G     0  7.3G   0% /sys/fs/cgroup
/dev/mapper/ocivolume-root   89G   34G   56G  38% /         # <----------------------- now is 89GB
/dev/mapper/ocivolume-oled   10G  160M  9.8G   2% /var/oled
/dev/sda2                   924M  585M  340M  64% /boot
/dev/sda1                   100M  7.2M   93M   8% /boot/efi
tmpfs                       1.5G     0  1.5G   0% /run/user/1000
tmpfs                       1.5G     0  1.5G   0% /run/user/986
/dev/loop0                   34M   34M     0 100% /var/lib/snapd/snap/snapd/21761
/dev/loop1                   60M   60M     0 100% /var/lib/snapd/snap/core20/2321
/dev/loop2                   43M   43M     0 100% /var/lib/snapd/snap/certbot/3832
/dev/loop3                   93M   93M     0 100% /var/lib/snapd/snap/core/17201
bellow is the same code with like a script that you run with root
# Create a new partition using fdisk
sudo fdisk /dev/sda <<EOF
n
p
4


t
4
8e
w
EOF

# Inform the OS of partition table changes
sudo partprobe /dev/sda

# Create a physical volume on the new partition
sudo pvcreate /dev/sda4

# Extend the volume group to include the new physical volume
sudo vgextend ocivolume /dev/sda4

# Extend the logical volume to use all the free space
sudo lvextend -l +100%FREE /dev/mapper/ocivolume-root

# Resize the XFS filesystem to use the new space
sudo xfs_growfs /
Install EPEL and update the machine
# update the machine
sudo dnf update -y

# install epel repo
dnf config-manager --enable ol8_developer_EPEL

# install utilities
sudo dnf install htop iotop curl -y

# disable firewalld
sudo systemctl stop firewalld
sudo systemctl disable firewalld

# install snap
sudo dnf install -y snapd
sudo systemctl enable snapd.socket
sudo systemctl start snapd.socket
sudo ln -s /var/lib/snapd/snap /snap
sudo snap install core
sudo snap refresh core
Docker Install
Now let’s install docker and docker-compose
# install docker
sudo dnf install -y dnf-utils zip unzip
sudo dnf config-manager --add-repo=https://download.docker.com/linux/centos/docker-ce.repo
sudo dnf remove -y runc
sudo dnf install -y docker-ce --nobest


# user creations
sudo groupadd docker
sudo usermod -aG docker $USER

# re-login to activate new group
# id
# uid=1000(opc) gid=1000(opc) groups=1000(opc),4(adm),190(systemd-journal),982(docker) context=unconfined_u:unconfined_r:unconfined_t:s0-s0:c0.c1023
After the installation, before starting docker we will customize some things
# change local location for storage
sudo mkdir -p /docker/files
sudo vim /etc/docker/daemon.json
#/etc/docker/daemon.json
{
"data-root": "/docker/files"
}After this the installation of docker and docker-compose is complete
#[opc@kasm-vm-vnic tmp]$ docker --version
#Docker version 26.1.3, build b72abbb
#[opc@kasm-vm-vnic tmp]$ docker composer --version
#Docker version 26.1.3, build b72abbb

sudo systemctl enable docker.service
sudo systemctl start docker
docker run hello-world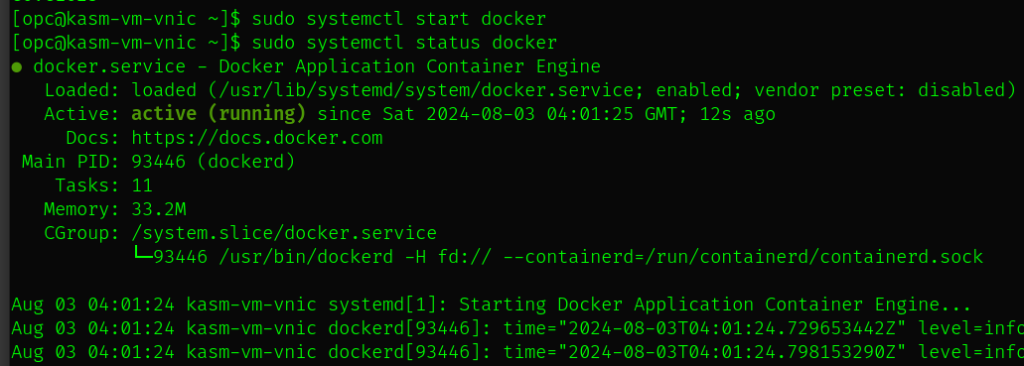
Then we need to add iptables awareness in docker
# iptables configuration
sudo dnf install -y iptables
sudo iptables -t nat -L
the output must look like this, there should be a chain called DOCKER
[opc@kasm-vm-vnic tmp]$ sudo iptables -t nat -L
Chain PREROUTING (policy ACCEPT)
target     prot opt source               destination
DOCKER     all  --  anywhere             anywhere             ADDRTYPE match dst-type LOCAL

Chain INPUT (policy ACCEPT)
target     prot opt source               destination

Chain POSTROUTING (policy ACCEPT)
target     prot opt source               destination
MASQUERADE  all  --  172.17.0.0/16        anywhere

Chain OUTPUT (policy ACCEPT)
target     prot opt source               destination
DOCKER     all  --  anywhere            !127.0.0.0/8          ADDRTYPE match dst-type LOCAL

Chain DOCKER (2 references)
target     prot opt source               destination
RETURN     all  --  anywhere             anywhere
Then we modify the daemon.json to include iptables as true
# /etc/docker/daemon.json
"iptables": true
and we restart docker
# restart docker
sudo systemctl restart docker
Cerbot install and configuration
# configure cerbot
sudo snap install --classic certbot
sudo ln -s /snap/bin/certbot /usr/bin/certbot
Kasm install and configuration
cd /tmp
curl -O https://kasm-static-content.s3.amazonaws.com/kasm_release_1.15.0.06fdc8.tar.gz
curl -O https://kasm-static-content.s3.amazonaws.com/kasm_release_service_images_arm64_1.15.0.06fdc8.tar.gz
curl -O https://kasm-static-content.s3.amazonaws.com/kasm_release_workspace_images_arm64_1.15.0.06fdc8.tar.gz
tar -xf kasm_release_1.15.0.06fdc8.tar.gz
sudo bash kasm_release/install.sh --offline-workspaces /tmp/kasm_release_workspace_images_arm64_1.15.0.06fdc8.tar.gz --offline-service /tmp/kasm_release_service_images_arm64_1.15.0.06fdc8.tar.gz
After the installation succeeds before starting to use we need to add SSL, for this, we will use cerbot, we will use HTTP challenge, and we will assume that the domain for which we will create the certificates is kasm.example.com for this, we will simulate before running the command to make sure it all works
# run thus command
sudo /usr/bin/certbot certonly --standalone --agree-tos --register-unsafely-without-email --preferred-challenges http -d kasm.example.com --dry-run

#Saving debug log to /var/log/letsencrypt/letsencrypt.log
#Account registered.
#Simulating a certificate request for portal.donhk.dev
#The dry run was successful.
Now this is the actual execution
# stop kasm
sudo /opt/kasm/bin/stop

sudo /usr/bin/certbot certonly --standalone --agree-tos --register-unsafely-without-email --preferred-challenges http -d kasm.example.com

# replace the self-signed certs
cd /opt/kasm/current/certs
sudo mv kasm_nginx.crt kasm_nginx.crt.bk
sudo mv kasm_nginx.key kasm_nginx.key.bk

sudo ln -s /etc/letsencrypt/live/portal.donhk.dev/privkey.pem kasm_nginx.key
sudo ln -s /etc/letsencrypt/live/portal.donhk.dev/fullchain.pem kasm_nginx.crt

# start kasm
sudo /opt/kasm/bin/start
[Update 11/02/2024]
After the first renewal of the certs kasm failed due to the certificates being unreadable the fix is below
sudo groupadd certaccess
sudo usermod -aG certaccess kasm
sudo usermod -aG certaccess my_user

sudo chgrp -R certaccess /etc/letsencrypt/live/kasm.example.com
sudo chgrp -R certaccess /etc/letsencrypt/archive/kasm.example.com

sudo chmod 640 /etc/letsencrypt/live/kasm.example.com/*.pem
sudo chmod 640 /etc/letsencrypt/archive/kasm.example.com/*.pem
sudo touch /etc/letsencrypt/renewal-hooks/post/fix_permissions.sh
sudo chmod +x /etc/letsencrypt/renewal-hooks/post/fix_permissions.sh#!/bin/bash
chgrp certaccess /etc/letsencrypt/live/kasm.example.com/*.pem
chmod 640 /etc/letsencrypt/live/kasm.example.com/*.pem
chgrp certaccess /etc/letsencrypt/archive/kasm.example.com/*.pem
chmod 640 /etc/letsencrypt/archive/kasm.example.com/*.pem
/opt/kasm/bin/stop
/opt/kasm/bin/startthe file /etc/letsencrypt/renewal-hooks/post/fix_permissions.sh will automatically be executed by Certbot after every successful renewal. Certbot runs any executable scripts placed in the following directories as part of its renewal process:
- Pre-Renewal Hooks:
/etc/letsencrypt/renewal-hooks/pre/ - Post-Renewal Hooks:
/etc/letsencrypt/renewal-hooks/post/ - Deployment Hooks:
/etc/letsencrypt/renewal-hooks/deploy/