Set up a media server in 30 min
The following is the improved version of a previous post where I showed how to do the same but using a paid VPS and a Raspberry Pi with a VPS.
This time we will use Oracle Cloud Infrastructure (free tier) and that’s it, so, let move.

Prerequisites, creating an account on Oracle Cloud (which is free) and having a computer (it can be a Raspberry or anything from which you can run ssh)
Configuring the VM
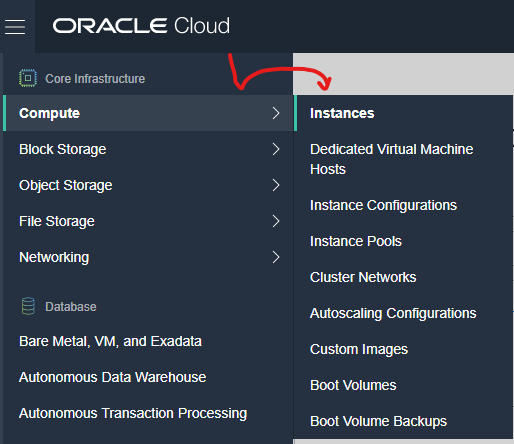
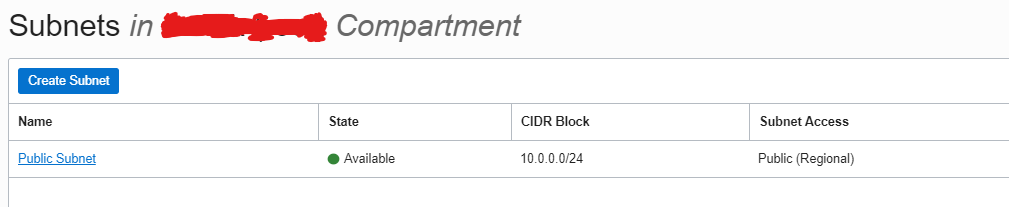
Once the Account is read go to your panel and create a new VM instance
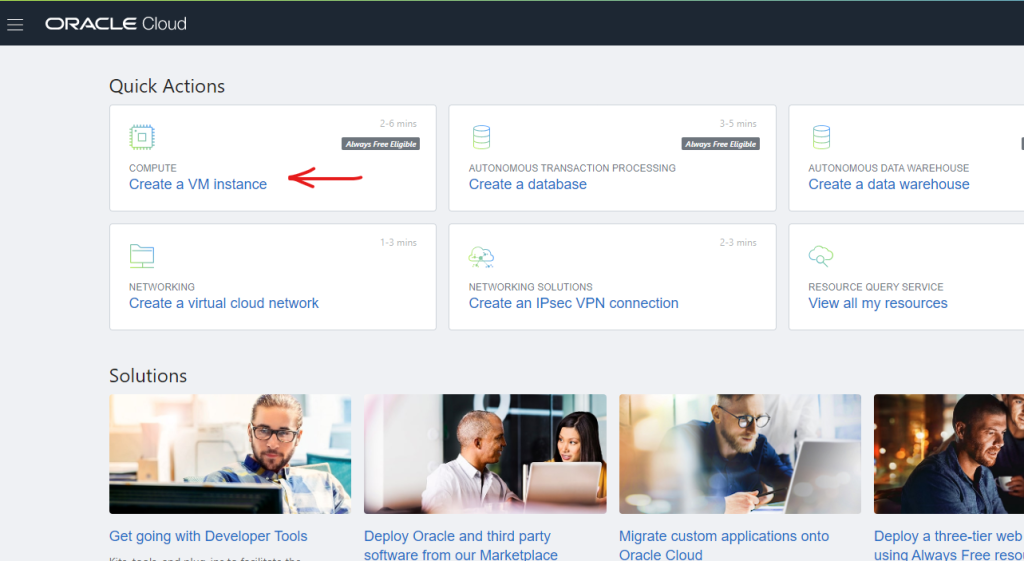
Don’t worry, this is going to cost $0.0 dollars
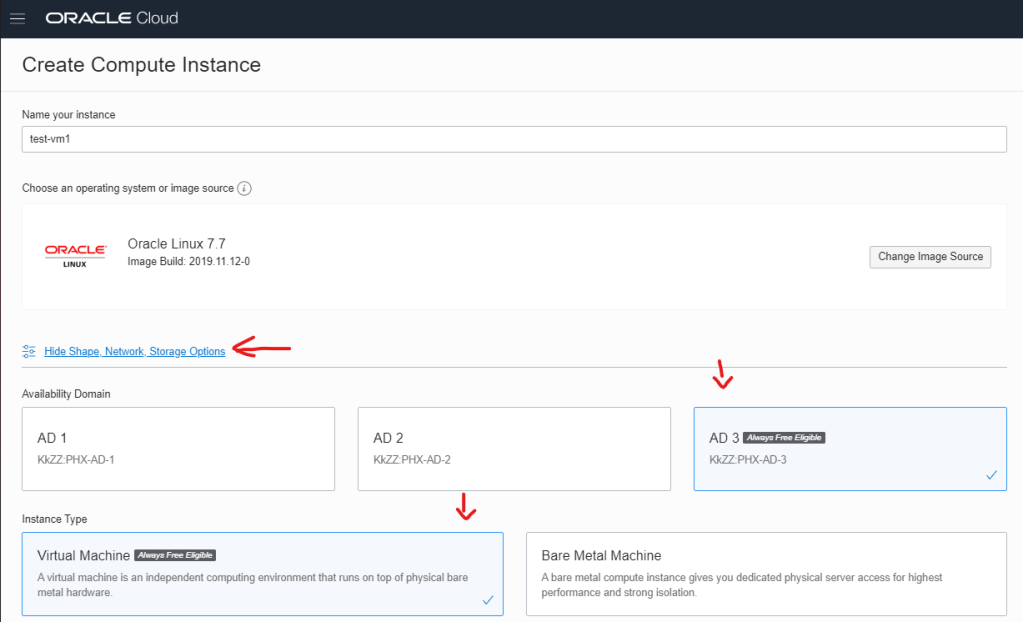
Configure the name and select the free version of everything, I choose the default OS (Oracle Enterprise Linux 7.x)
You will needs a public key for authentication
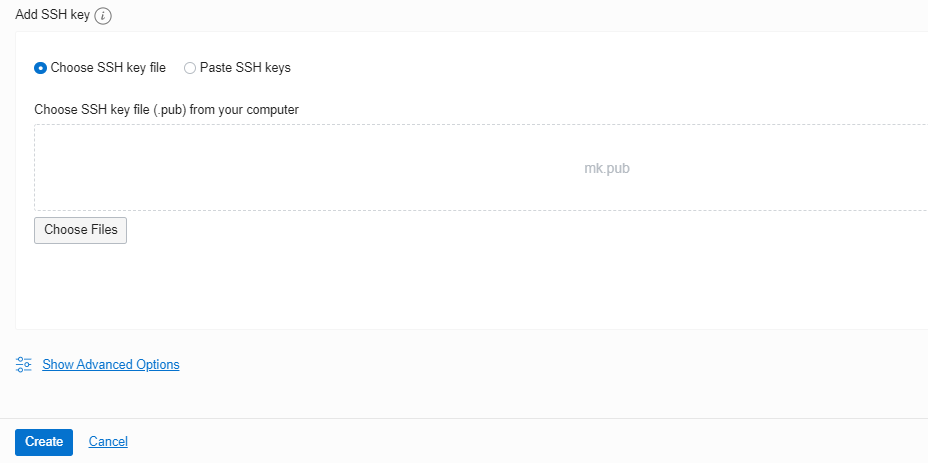
just create one, if you are on Windows I recommend to do so using the bash for Windows that comes with git, once it was created upload your public key and hit the create button.
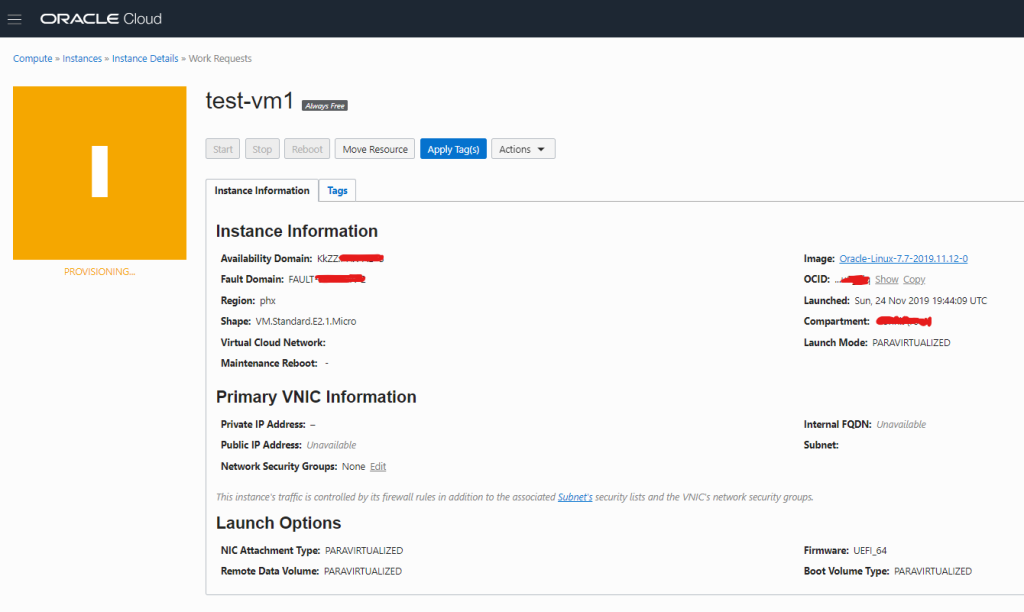
in 2 to 3 minutes you will be able to access to it from the left panel
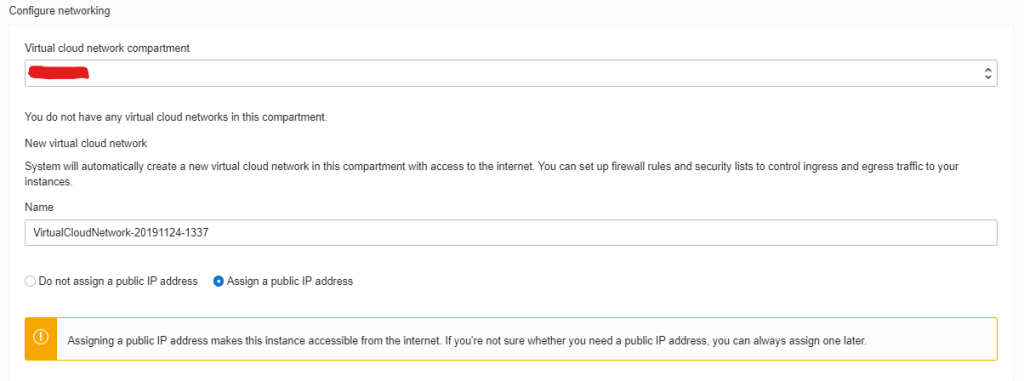
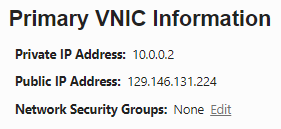
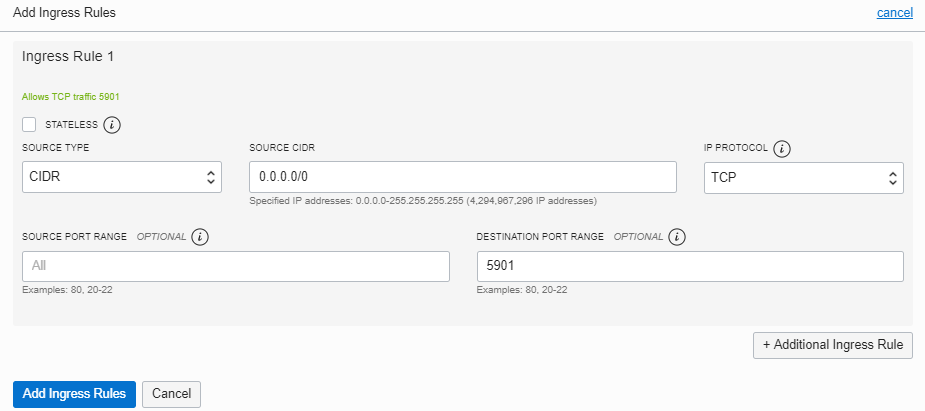
Once the instance is ready we need to configure the public IP because it will be disabled by default
don’t bother trying to hack me buddy 🙁 by the time you are reading this non of the above info will be valid
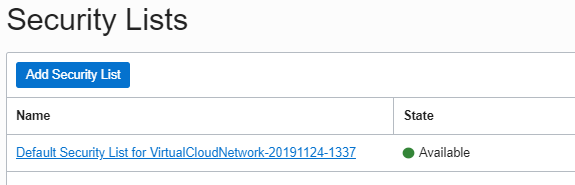
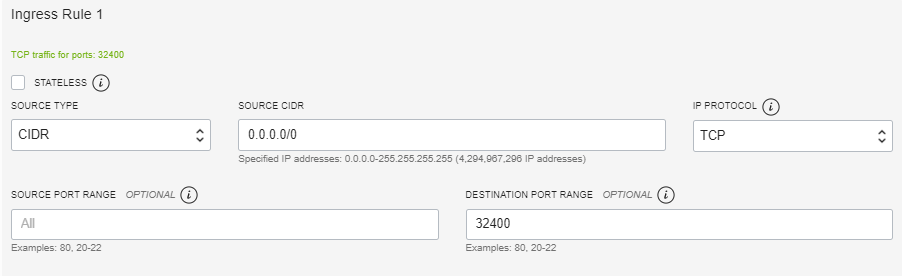
Almost done, now let’s configure some inbound rules

Logging within the fresh VM
If all the above steps succeed, now you can access to the VM using the below command from any ssh client.

Make sure you properly configure the firewall, for simplicity in this tutorial we will just stop it (sorry mom for my crazy life)

Provisioning VM
Some software to make everything easier (I don’t like having to install all the GUI stuff but sadly Plex does not allow configure it outside of a localhost connection so :(, just a few more lines to copy and paste)
sudo yum groupinstall "X Window System"
sudo yum install -y gnome-classic-session gnome-terminal nautilus-open-terminal control-center liberation-mono-fonts
sudo yum install tigervnc-server openbox tint2 firefox
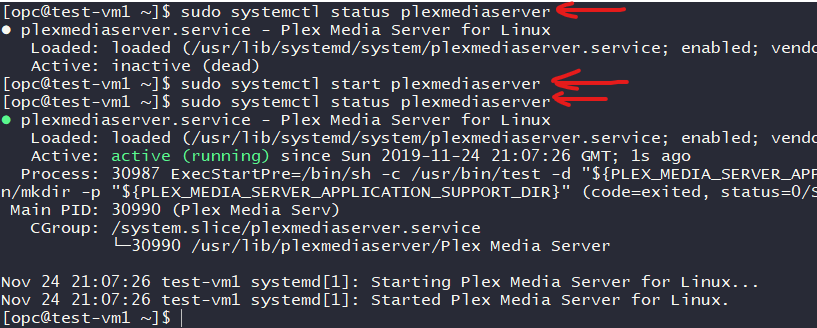
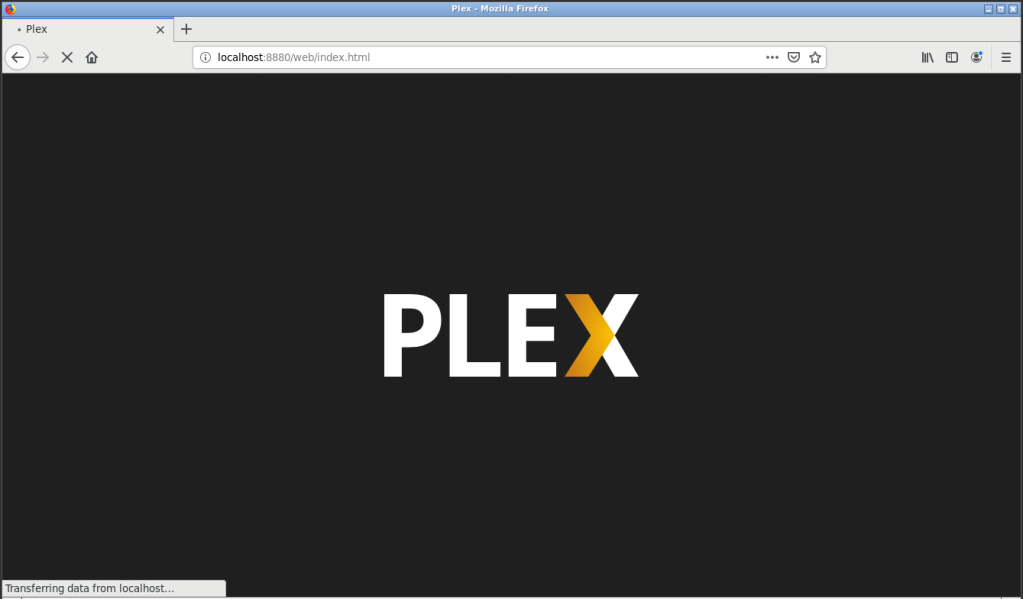
now let’s download Plex
wget https://downloads.plex.tv/plex-media-server/1.14.1.5488-cc260c476/plexmediaserver-1.14.1.5488-cc260c476.x86_64.rpm

install it and start it
sudo yum install -y plexmediaserver-1.14.1.5488-cc260c476.x86_64.rpm
sudo systemctl start plexmediaserver
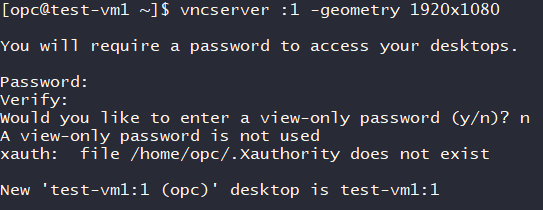
Configuring VNC server to connect, create this file .vnc/xstartup with the below content
!/bin/sh
exec /usr/bin/openbox-session &
exec tint2 &
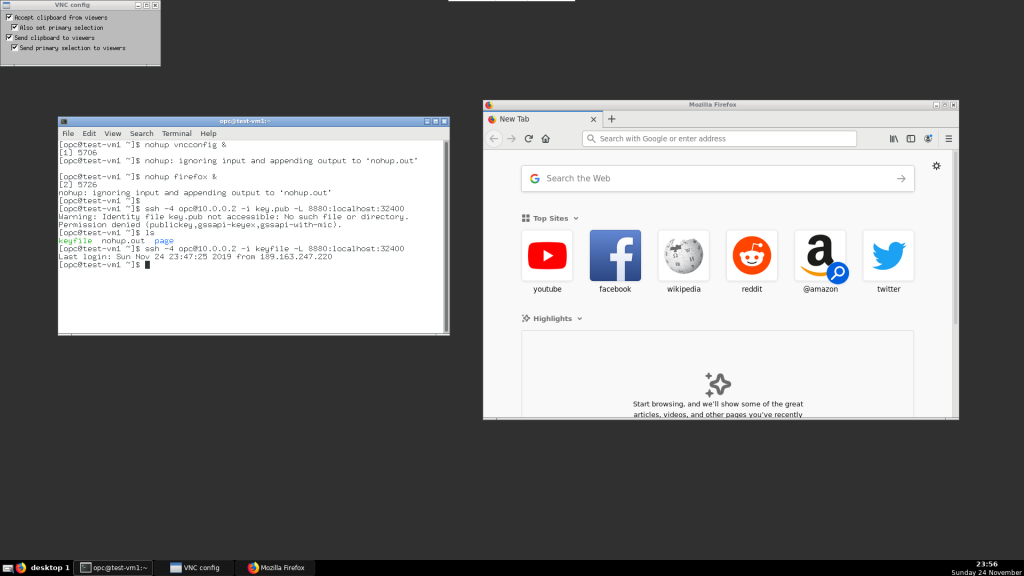
then execute vncserver :1 -geometry 1920x1080
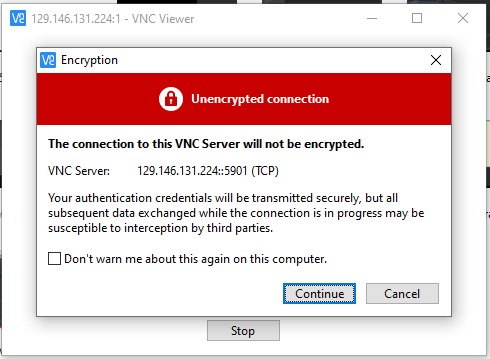
Now you can enter to your server through vnc 129.146.131.224:1 connection and open firefox
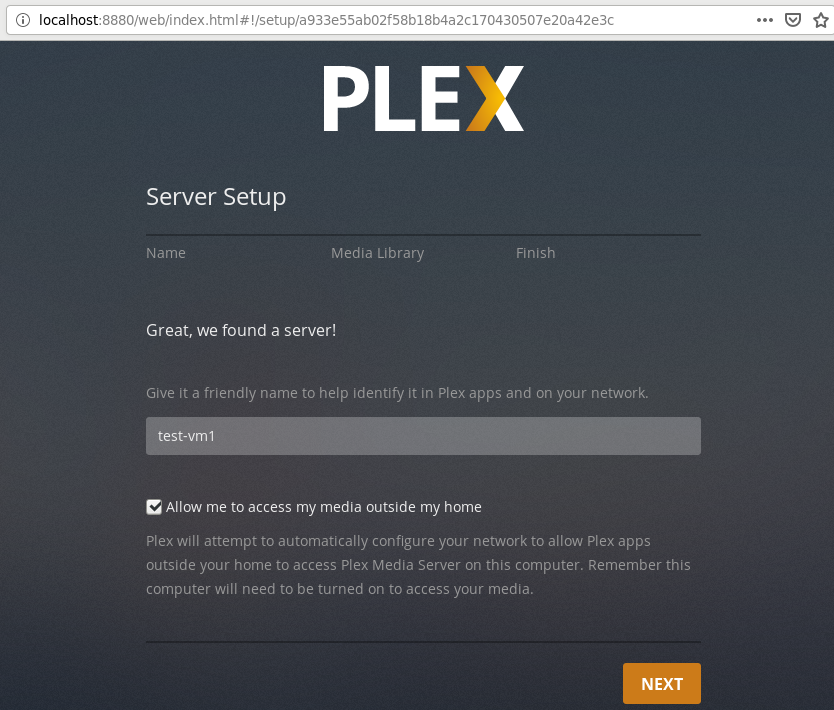
now let’s create a a SSH tunnel in order to configure the Plex instance, to do so, copy your private key to the server and run
ssh -4 opc@10.0.0.2 -i keyfile -L 8880:localhost:32400
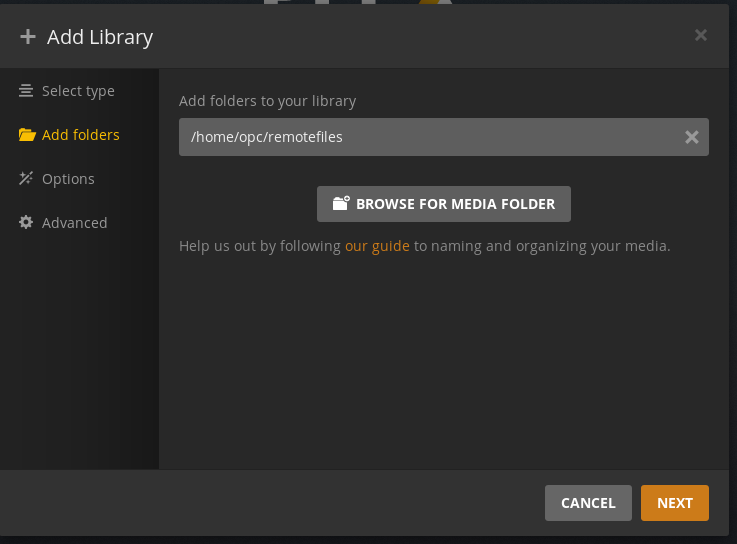
Here is a tip, you can always buy space on the cloud an connect storage blocks to your instance to have them handy or you can take advantage of any old pc in your home to mount the remote filesystem like below.
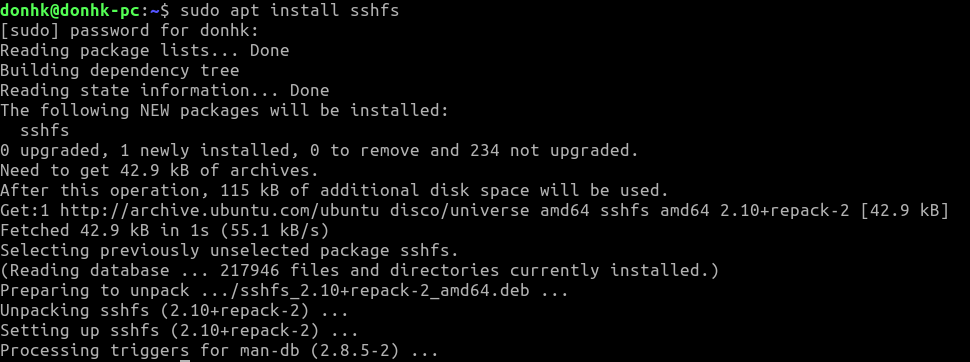
sudo sshfs /home/donhk/muscx opc@129.146.131.224:/home/opc/remotefiles -o IdentityFile=/home/donhk/keys/keyfile -o nonempty -o allow_other
Note the above command will mount the local folder muscx into the connect the remote folder remotefiles, for better results I recommend setting up a VPN and mounting from the server towards the local machine in order to mount a whole partition :), will post it later
and that is all, now you can combine this with a VPN to allow the Oracle VM to connect to the music library too 🙂
I recommend you to disable the vnc access as soon as you finish to prevent funny guys from trying to break into your server
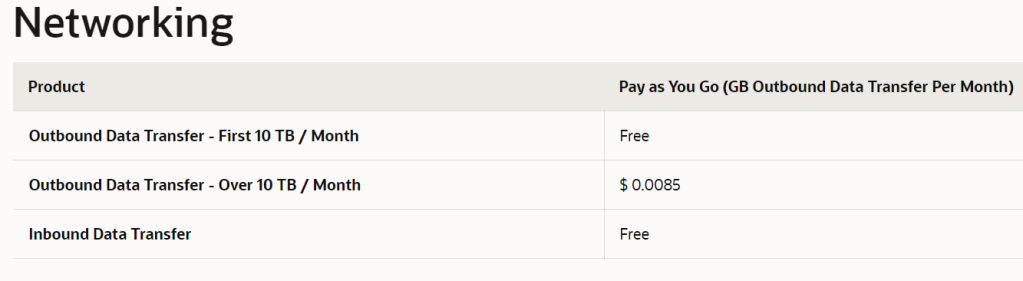
Regarding the costs, don’t worry, the free tier comes with 10 TB per month which is a lot more than most paid VPS