

Configuring a LAMP site on Oracle Cloud and Google G Suite for DNS resolution with SSL

Someone asked me for help to configure a domain and I found out that there are lot’s of tutorials out there that aim to show you how to configure a web site using Oracle Cloud but any of them actually shows what you need to do if you want to do something productive with it, for example, host the website on a VM of free tier whereas the domain is managed by a 3rd party company such as Google using G Suit.
Project Architecture
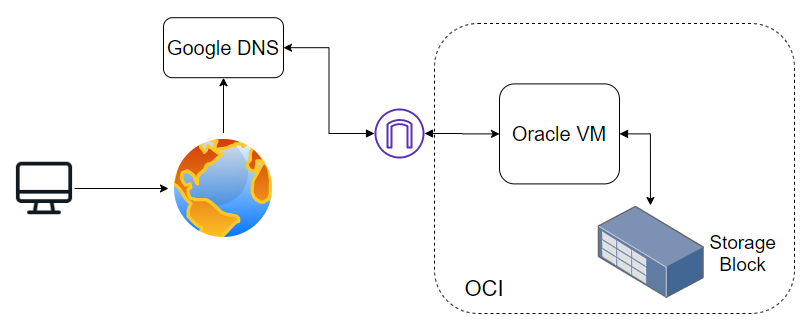
Client search for a domain, the domain is resolved within Google DNS, it resolves to VM within Oracle Cloud which has an Internet Gateway, the VM has attached an additional storage block.
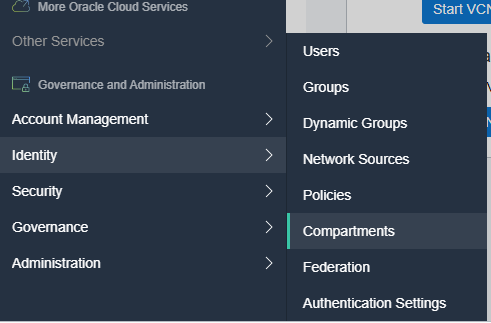
Creating a Compartment
This step is optional but certainly is helpful to have everything under control because the things can become crazy from one step to another and you don’t want to delete by accident a production machine.
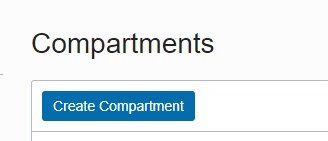
Then
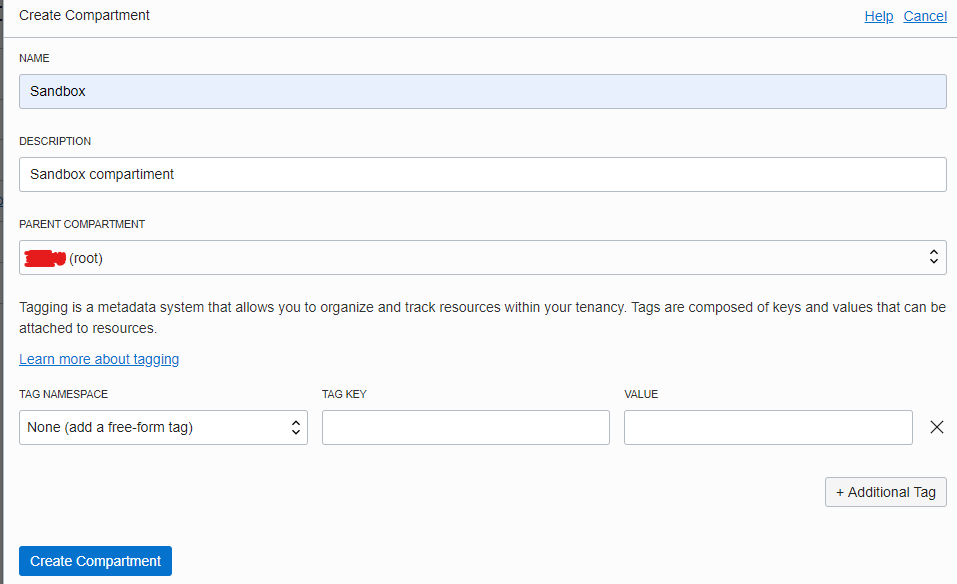
Once created the compartment will look like this
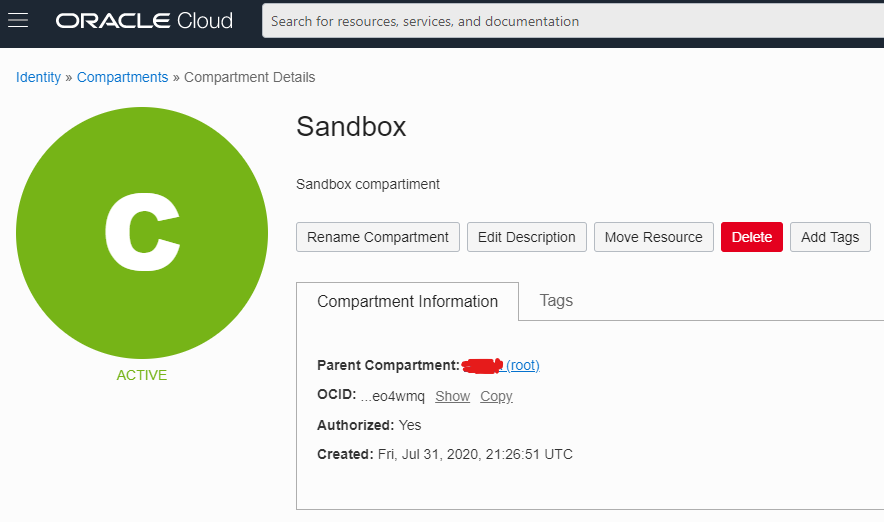
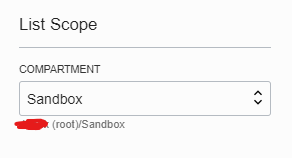
Finally switch the global compartment to start using the Sandbox
Creating the Virtual Cloud Network (VCN)
This is the first important step on a series of very important and deadly steps, this VCN is the representation of a physical network that will be attached to the VM.
Each VCN can have one or more subnets which is what the actual VM will interact with, if later you want to connect two VMs to interact with each other they need to be connected to the same VCN/subnet or there must be a gateway so that they can go out of the VCN to a local DNS, since configuring those things is not trivial we will go with the wizard.
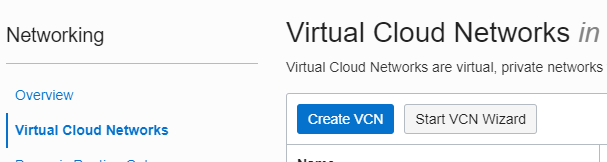
click Start VCN Wizard
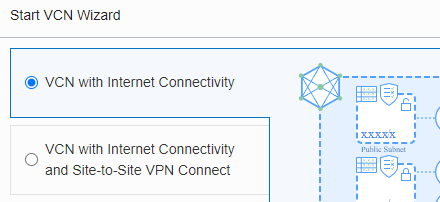
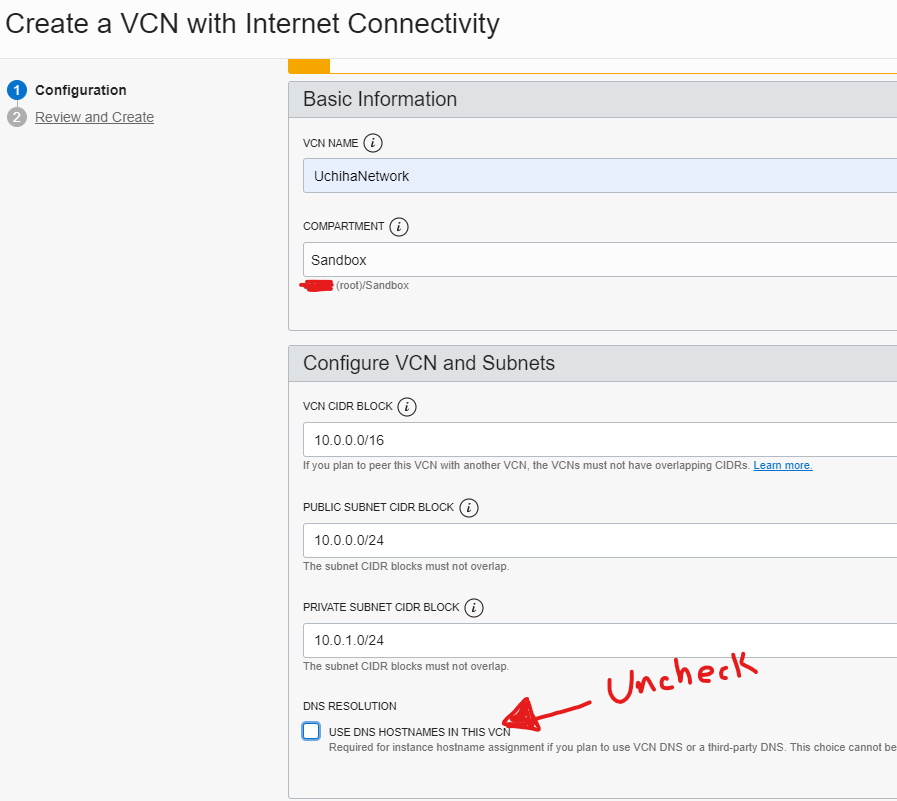
It is important to uncheck the checkbox, otherwise the 3rd part DNS won’t work

The wizard will configure the subnets and internet gateway for us
Once it is created it should look like this
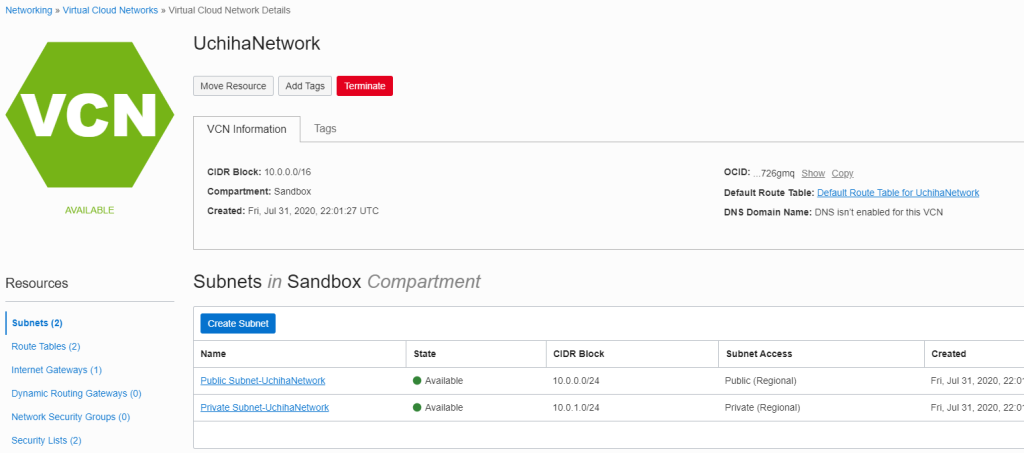
Now we need to configure the security lists to configure the firewall, click on Public Subnet-UchihaNetwork
then
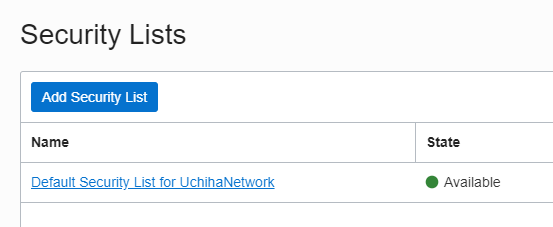
and add/modify the ingress rules
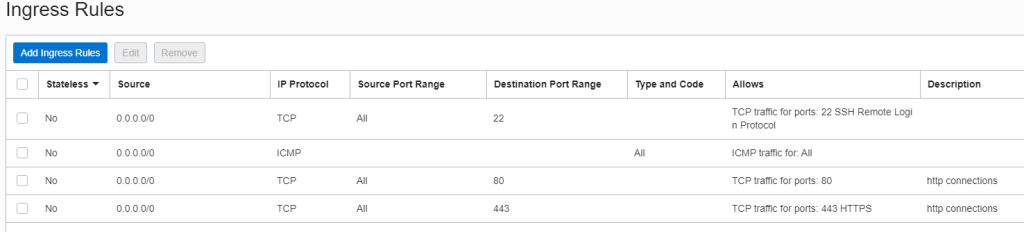
For production servers it is recommended to limit the source of access the ports, this is just an example 😉
Creating the VM to host the site
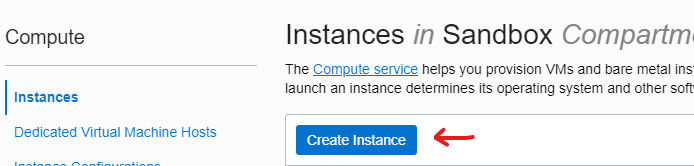
give it a name
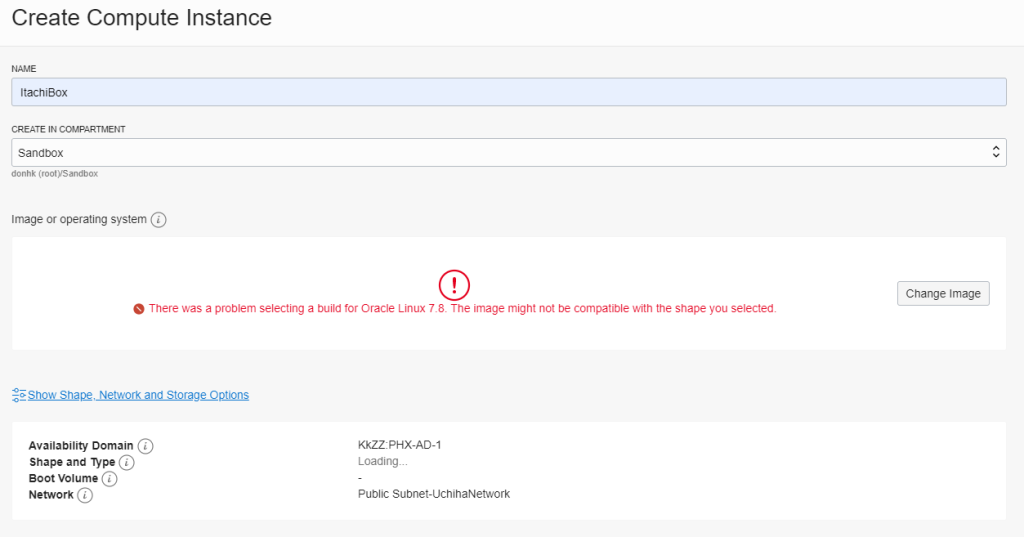
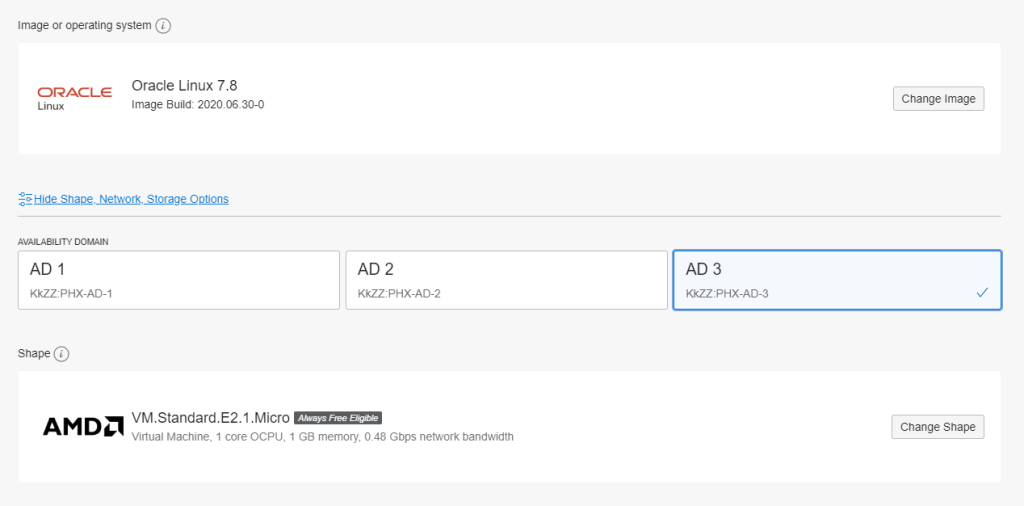
If you see that problem, click show shape, network and storage and pick another availability zone
On the VM network configuration
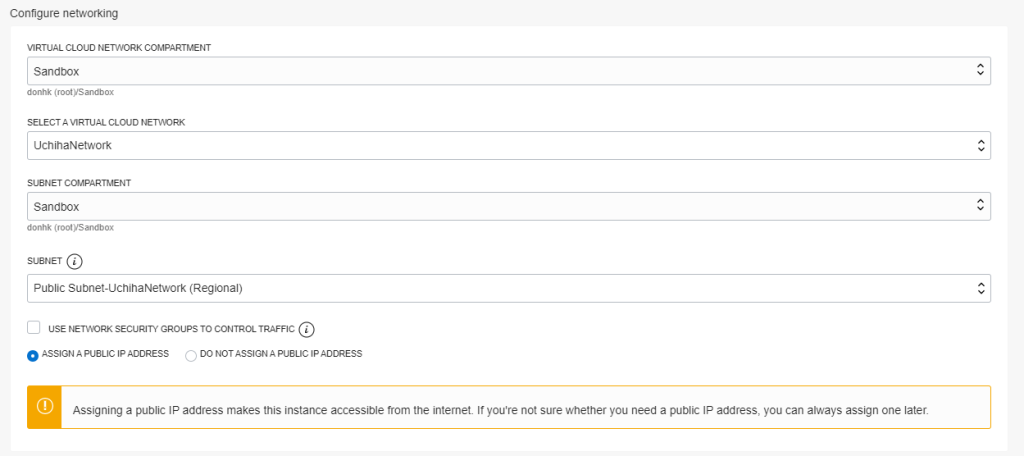
choose the one we just created, for production machines it is not recommended to assign an IP address although it is pretty comfortable 😉
finally download your ssh keys
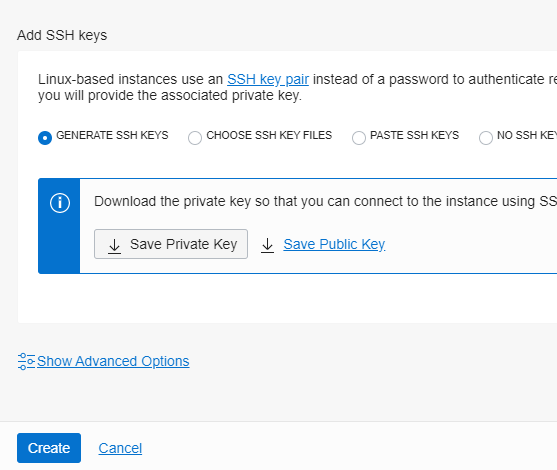
and hit create, the provision finished it should look like this
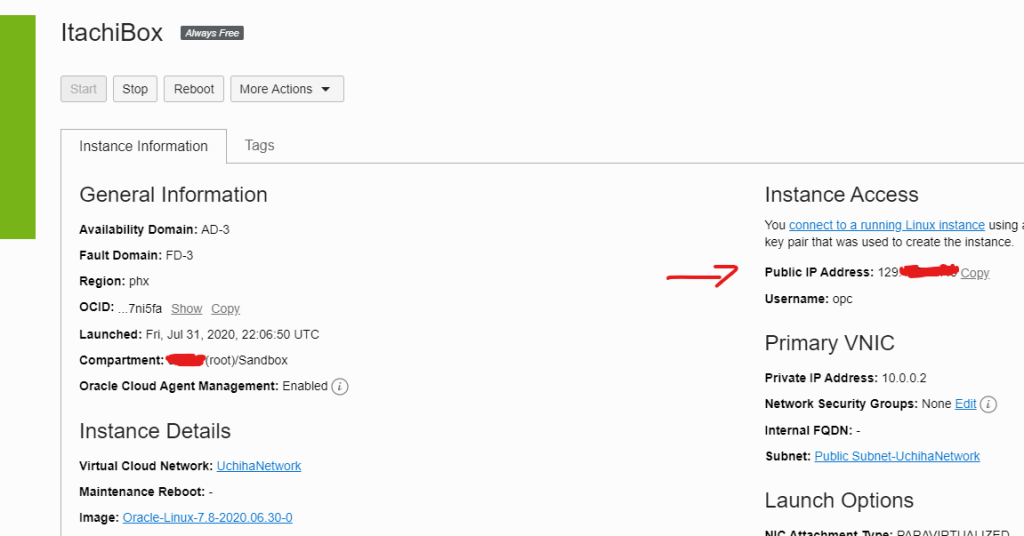
to connect to it you can use
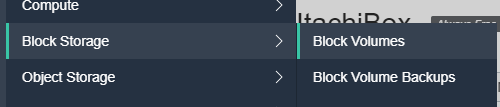
ssh -i ~/path/to/my/key opc@129.x.x.xAdding a Storage Block to the VM
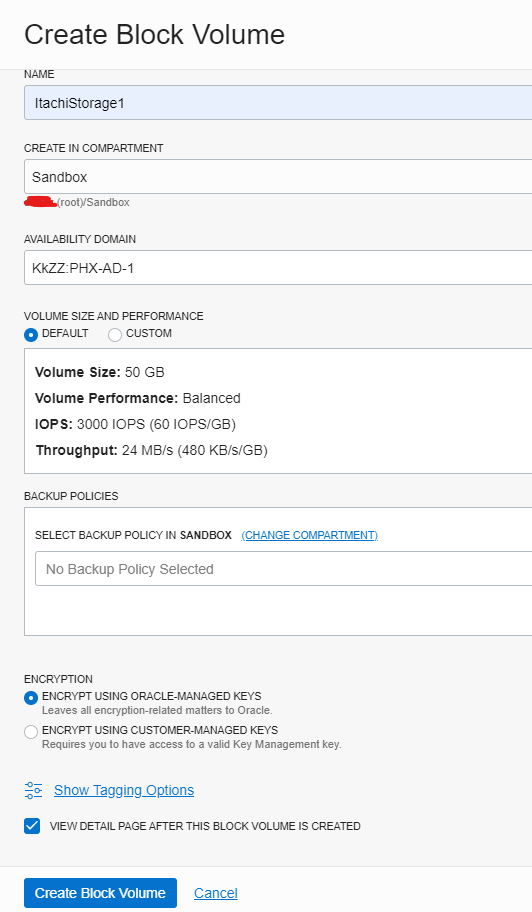
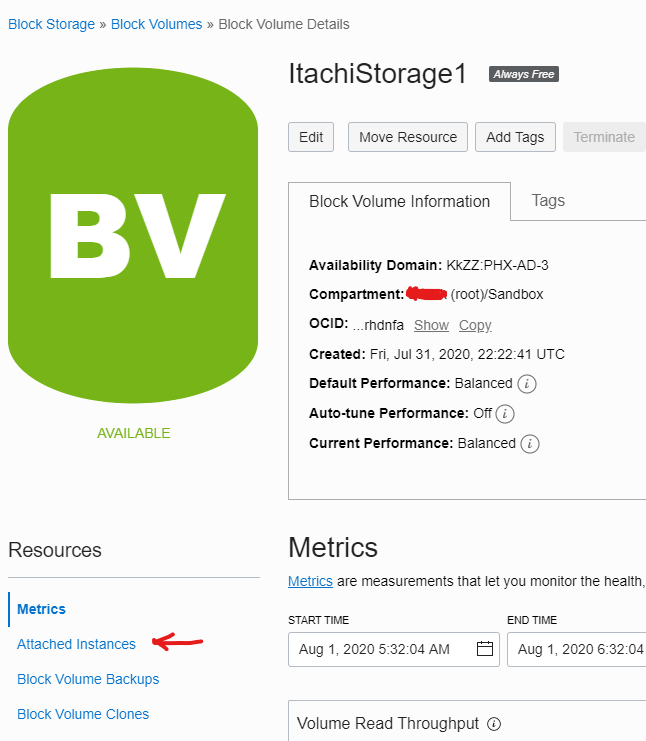
This will be used to add 50GB extra for stuff we want to save within the VM

Give it a name and hit Create Block Volume
Now click on attached instances
and attach it using the below configuration
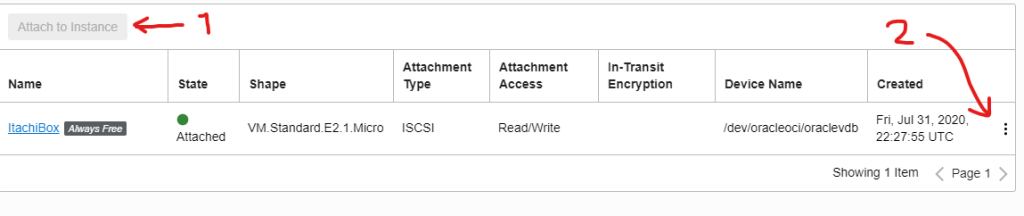
Now, click the 3 dots and display the commands to attach it within the VM
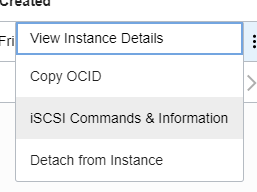
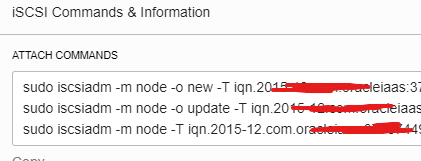
Connect to the VM and execute these commands, at the end execute
sudo fdisk -lyou should see something like this
[opc@ItachiBox ~]$ sudo fdisk -l
WARNING: fdisk GPT support is currently new, and therefore in an experimental phase. Use at your own discretion.
Disk /dev/sda: 50.0 GB, 50010783744 bytes, 97677312 sectors
Units = sectors of 1 * 512 = 512 bytes
Sector size (logical/physical): 512 bytes / 4096 bytes
I/O size (minimum/optimal): 4096 bytes / 1048576 bytes
Disk label type: gpt
Disk identifier: 015426EE-BC04-43B2-B3CA-33C6BC4DB2C2
#         Start          End    Size  Type            Name
 1         2048       411647    200M  EFI System      EFI System Partition
 2       411648     17188863      8G  Linux swap
 3     17188864     97675263   38.4G  Microsoft basic
Disk /dev/sdb: 53.7 GB, 53687091200 bytes, 104857600 sectors
Units = sectors of 1 * 512 = 512 bytes
Sector size (logical/physical): 512 bytes / 4096 bytes
I/O size (minimum/optimal): 4096 bytes / 1048576 bytes
Disk label type: dos
Disk identifier: 0x60d33bb9
Now, to use it, we need to format it, to do it follow these instructions and the entry in the /etc/fstab must look like this
/dev/sdb1 /scratch ext4 defaults,_netdev,nofail 0 2then
sudo mkdir -p /scratch
sudo mount -a
sudo chown -R opc:opc /scratch
df -h
you should see something like
[opc@ItachiBox ~]$ df -h
Filesystem      Size  Used Avail Use% Mounted on
devtmpfs        458M     0  458M   0% /dev
tmpfs           486M     0  486M   0% /dev/shm
tmpfs           486M   13M  473M   3% /run
tmpfs           486M     0  486M   0% /sys/fs/cgroup
/dev/sda3        39G  3.0G   36G   8% /
/dev/sda1       200M  8.6M  192M   5% /boot/efi
/dev/sdb1        50G   53M   47G   1% /scratch
tmpfs            98M     0   98M   0% /run/user/1000
Installing LAMP
Start copy paste section 😉
sudo yum install httpd
sudo systemctl enable httpd
sudo systemctl restart httpd
sudo firewall-cmd --permanent --add-port=80/tcp
sudo firewall-cmd --permanent --add-port=443/tcp
sudo firewall-cmd --reload
sudo yum install https://dl.fedoraproject.org/pub/epel/epel-release-latest-7.noarch.rpm
sudo yum install http://rpms.remirepo.net/enterprise/remi-release-7.rpm
sudo yum install yum-utils
sudo yum-config-manager --enable remi-php73
sudo yum install php php-mcrypt php-cli php-gd php-curl php-mysql php-ldap php-zip php-fileinfo
Verify it
[opc@ItachiBox ~]$ php -v
PHP 7.3.20 (cli) (built: Jul  7 2020 07:53:49) ( NTS )
Copyright (c) 1997-2018 The PHP Group
Zend Engine v3.3.20, Copyright (c) 1998-2018 Zend Technologie
Document Root will be under
/var/www/html/Now, if you try to access your site on your browser in the address http://129.x.x.x it work just fine, however, once the DNS is configured, modern browser will fail to load the site because non https connections are now banned from most browser :c, before being able to fix that we must configure the DNS
Configuring the DNS on G Suit
This applies only for domains managed by Google DNS, although the procedure must be the same for other providers.
Login within the google account, in the case the domain and the account is
insti************.page
jsuser@insti************.page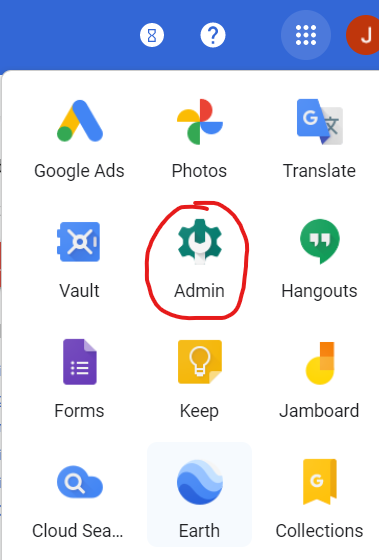
then
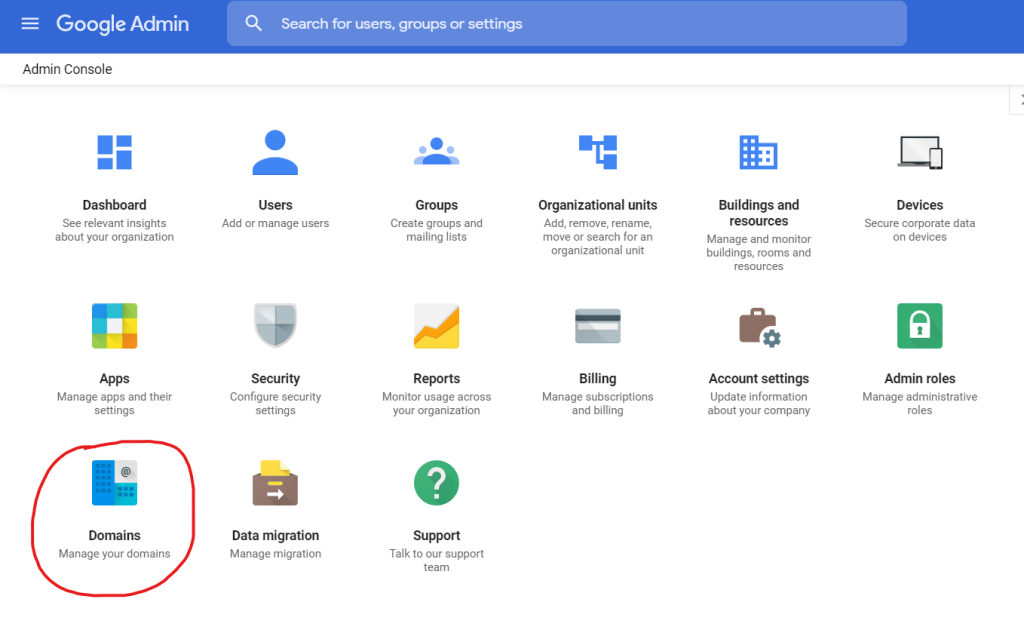
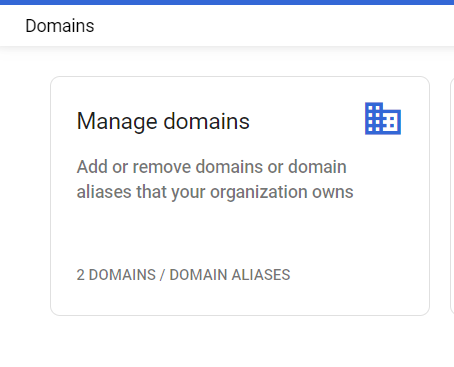
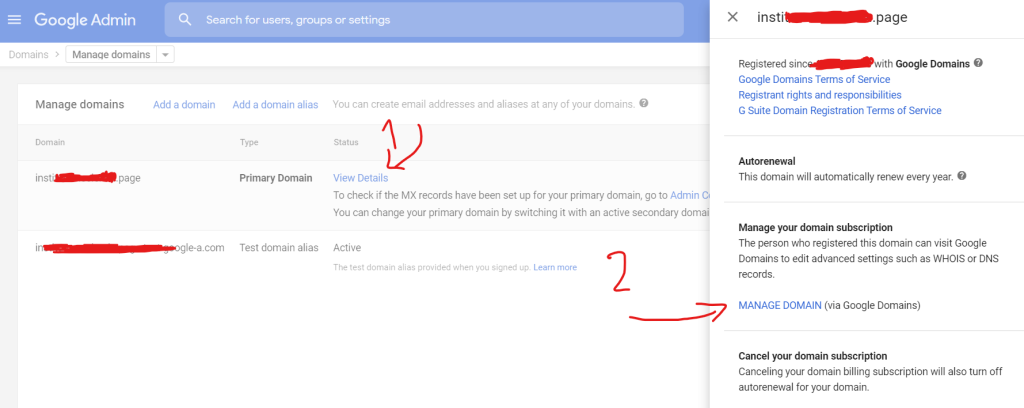
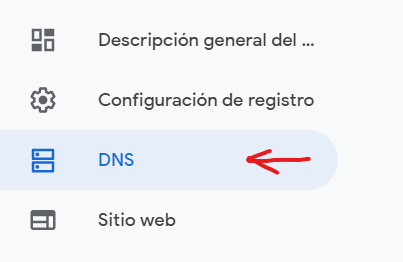
Then go to the bottom and add the below records to the DNS

(example.com) A record pointing to IP of the VM created above
www.example.com CNAME pointing to example.com
After that wait 20 min (it can take up to 48 hours)
Now check if DNS resolves properly using curl -IL example.com
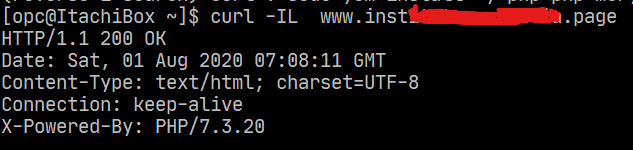
if it responds in the terminal, we can proceed to configure the SSL (the last dead step) you can now access to the sample page created within the www through the IP but not the domain, not because Google or Oracle are wrong configured but because modern browsers will request by default content from the port 443 but there is no cert yet, so, nothing comes out of it.
Adding SSL to the site
To create the certificates, we will follow the instruction from this post, once the certificates are created, we need to configure apache2 on CentOS/Oracle Linux the steps below.
At the end of the certificate creation you should get something like this
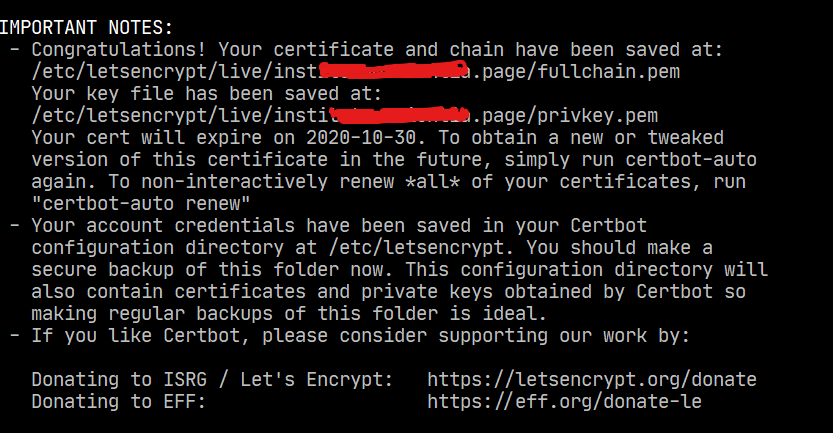
now
sudo vim /etc/httpd/conf.d/ssl.confand modify the below values
SSLEngine on
SSLCertificateFile /etc/letsencrypt/inst....page/fullchain.pem
SSLCertificateKeyFile /etc/letsencrypt/inst....page/privkey.pem
SSLCertificateChainFile /etc/letsencrypt/inst....page/cert.pem
finally
sudo systemctl restart httpd
sudo systemctl status httpd
expected output
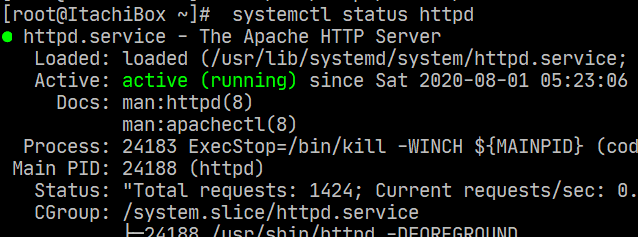
now the browsers will open the page

Now you can install other stacks and play around with a free hosting that offers 150GB of storage (you can attach more blocks) 🙂
There are some other things than can be added to the stack such as a load-balancer and having two VMs serving but that will be covered on a later post.
Post finished at 2.32AM sorry for the typos if any 😉
Links
https://www.ssls.com/knowledgebase/how-to-install-an-ssl-certificate-on-apache/
2 thoughts on “Configuring a LAMP site on Oracle Cloud and Google G Suite for DNS resolution with SSL”